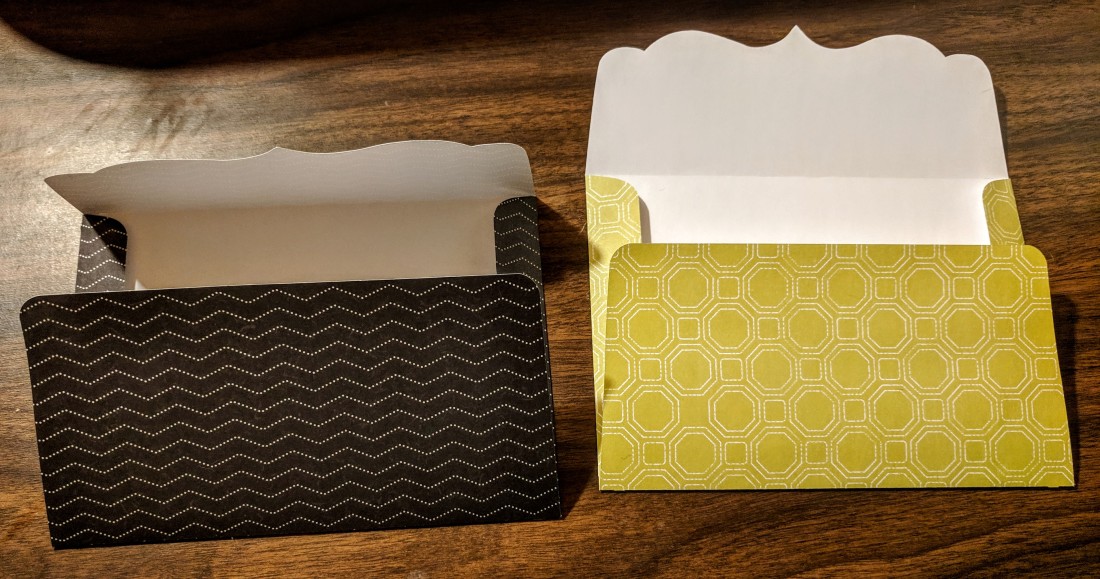
Snazzy Envelope

How fun to bring some pizzaz to an envelope! Wouldn’t these be fun to receive in the mailbox?!

  • Envelope Address Wrap–Cardstock

The Process:

Choose pretty paper, cut…

Score, fold, glue….admire! (not sure why this design doesn’t have the scoring programmed in; it creates tiny cuts like notches instead; I just used those as guides with my ruler and scoring tool)

Overall a very cute design that I think I’ll refer to often!

Domed Cupcake Box

Here’s another intricate design to add to my collection! I am so drawn to these things!

  • Domed Cupcake Box–Cardstock & Acetate

The Process:

Even with such a detailed cut this ended up so easy to just lift off the mat. Gluing the acetate over the windows and waiting for it to cure before folding took some patience (because I want to see it NOW), but absolutely worth giving it time. Dealing with all that work falling off would be too crushing!

A little close-up

We’ll, I learned that I needed to fold the scores before placing (and gluing!) the acetate. I had to re-glue some ðŸĪŠ but it still turned out so I’m happy!

Ready to place something yummy in there.

What a beautiful way to present your special homemade dessert!

Star Burst Card

I finally found something I wanted to make that utilized a pen during the cutting process! It was SO much fun to watch! This is a very beautiful card!

  • Star Burst Card–Cardstock

The Process:

Watch the pen do all the work! 😉

Fold on scores, glue in place, embellish if desired (I plan to add a ribbon across the top, maybe more…).

This is considered a money-holder card and would be wonderful for a graduate or baby shower. Again, endless possibilities with color combinations!

I trimmed each paper close to the size required for loading before I began which really improved the speed of the process! Learning! 🙂 (learning through mistakes and practice is definitely working)

Scalloped Treat Boxes

Talk about simple! This was the easiest project I’ve done so far. Just loaded the paper, folded at the scores, and glued! I think this is a great use for my foil poster board as it’s much sturdier than cardstock.

  • Martha’s Scalloped Popcorn Boxes–Foil Poster board

The Process:

I suggest defining your score folds by using a scraping tool on the inside to hold the shape

Then turn the outside in and press for those final crisp edges. I love how this scraper has a cloth-covered side. Worked real well in protecting the sheen of the posterboard!

I highly recommend Cricut’s Paper Trimmer! It makes all the cutting a breeze and helps me save a lot of scraps for more projects.

Lovely Black Cats

Getting into a bit of a sticker craze! Loads of requests! A couple of these sweet black cats will go on my daughter’s laptop (I’ll update once we place them on). I’m enjoying it. They’re quick and easy, especially the silouettes! These were found by searching images in the Canvas.

  • Vinyl

Applied to laptop! (my daughter altered the eyes a bit with a gel pen, pretty cool)

Cute Raccoon

I just made a little something today and didn’t get any pics of the process because I was having too much fun showing my kids how it all worked! This involved three layers of vinyl and transfer tape to compile it all together. I changed up the design from an iron-on lunchbox decal to a vinyl sticker. Later I discovered a lot more raccoon options by going to the Canvas and searching from images! I’ll be using that a lot from now on. Endless possibilities! 🙂

  • Raccoon Lunchbox–Vinyl

Vinyl Stickers

My kids like to decorate their water bottles with stickers. We’ve learned the hard way the importance of using only vinyl for such expression! To cover up a sticky mess gone bad, I made a couple new vinyl stickers for my daughter. Wish the pictures could show the full beauty this irredescent vinyl emits!

  • Christmas Stars Cup–Vinyl
  • Heart Water Bottle–Vinyl

The Process:

The tiny-hooked weed tool worked very well for weeding out all the negative space. So intricate and pretty!

Using transfer tape to place it on the bottle

So easy! We’ll let the vinyl cure for a couple of days before use.

You can create a sticker for just about anything of interest. Simply search the topic and customize it to your liking in the app. I’m finding it to be very user-friendly which is good because I’m not really technically savvy! I’ll be making plenty more of these to keep our water bottles festive!

Pop-Up Valentine

How adorable is this card? We’re a cat-loving household, so I couldn’t pass up the opportunity to make it. Plus, pop-up!

  • Pop-Up Card-Cute Kitties–Cardstock

The Process:

Loaded the mat 12 times for these babies, phew! They’re so CUTE! Ready for assembly…

Card base

Layer Layer Layer!

One more view! Purrfect ðŸ’žðŸą My youngest daughter will be receiving this on Valentine’s day. Very fun to put together. Time-consuming but rewarding! My first pop-up!

Dimensional Art

When I saw this project in the Design Space App I immediately loaded my paper and got to work. I have a great love for dimensional and textural art so I’m ecstatic to make my own and add it to my walls! Easy to put together and looks quite special.

  • Flower 3D Wall Art–Light Cardstock

The Process:

Simply curl the petal cuts in with a pencil or chop stick. I liked using a chop stick because of its width choices and smooth wood rather than having the bumpiness of a pencil.

Trying to decide on a background color. The gray appears too subtle, and I’d like this artwork to pop!

Mini Pennant Banner

How cute is this little banner? I’ve hung it at the entrance to my craft room and am thrilled with the boost of joy it gives me as I create!

  • Pennant Banner–Light Cardstock

The process:

Some of my measurements were off as all the papers had to be loaded on one mat. A few papers lifted up during cutting, so I manually trimmed them leaving only one unusable piece. Not too bad!

I’m very happy with the results!! This is a very simple project for any occasion and a great way to use up scraps! Color options are endless too.